|
Minor Adjustment - Rear drum in disc brake type
-
-
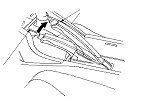
Release the parking brake lever fully.
-
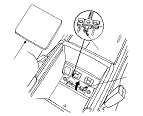
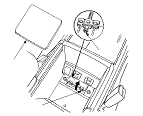
Remove the console box mat (A) then open the lid (B).
NOTE: It is easier to use packing tape to remove the console box mat.
-
Pull the parking brake lever 1 click.
-
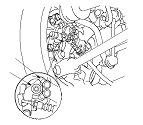
Tighten the parking brake adjusting nut (C) until the parking brakes drag slightly when the rear wheels are turned.
-
Release the parking brake lever fully, and check that the parking brakes do not drag when the rear wheels are turned. Readjust if necessary.
-
Make sure the parking brake lever within the specified number of clicks (5 to 7 clicks).
-
Close the lid, then install the console box mat.
|